


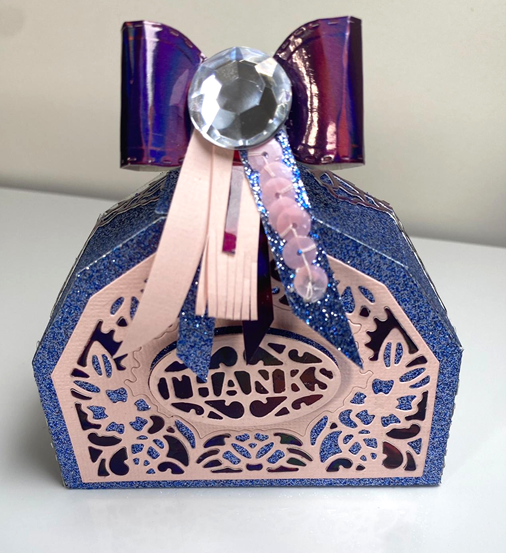
Hello beautifully talented and creative friends. My name is Sasha and I am so excited to be crafting with you using the awesomely rebranded kit 45! Doesn't it just look gorgeous! So let's dive in and make this cute purse box gift box.
What you will need
What you will need
- Your dies from the kit
- Cobalt blue Craft Perfect glitter card
- Blossom pink Craft Perfect classic card
- Purple rain Craft Perfect mirror card
- Spring Rose Pure Sheen sequins
- Brad/ fastener (you can repurpose one from Tonic packaging)
- Hot glue gun
Step 1
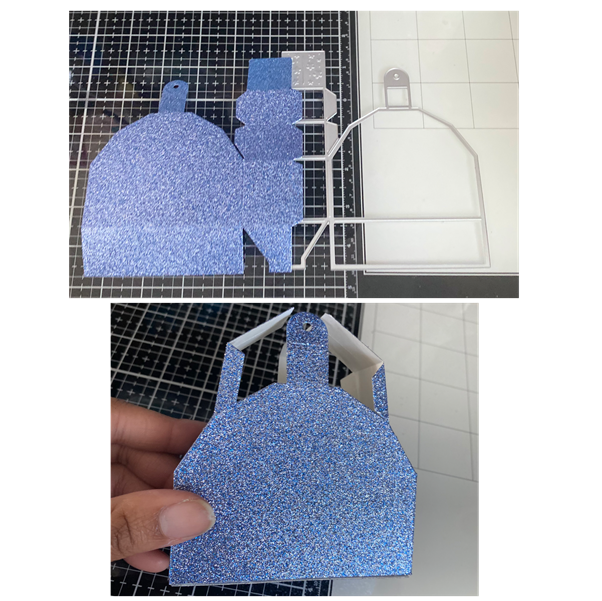
Using the box base die, cut out 2 panels from the cobalt blue glitter card. Score and glue together your box. (There are a few instruction videos you can check out over on the Tonic youtube to see how you do this.)
Step 2

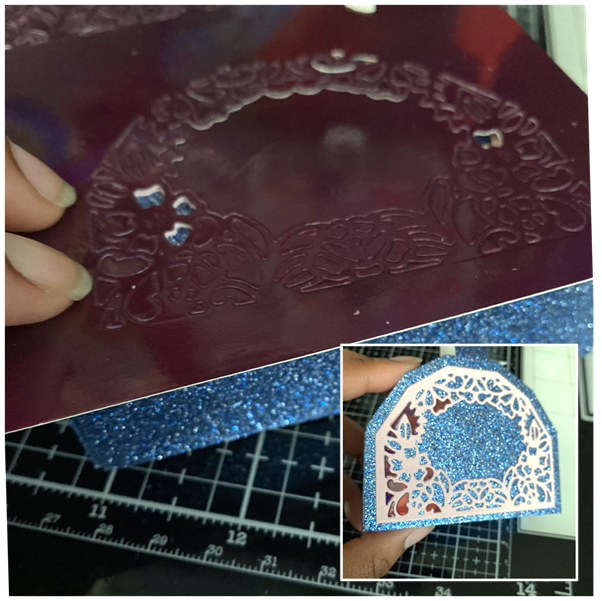
Using whichever design you prefer and the outline die, cut out 2 decoration panels out of the blossom pink cardstock. Make sure you keep the centre shape thing that comes out. Please refer to pic in step 7 because I know my description is just rubbish
Step 3
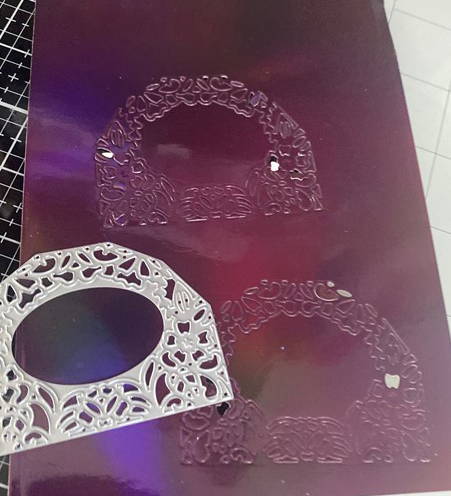
Just using the decorative die this time without an outline cut out 2 pieces from the purple rain cardstock. The trick is to keep everything in one piece. Do not try and remove any pieces because you will use this to inlay. Also please be more economical when placing your dies. I know you are much smarter than me so don’t do what I did.
Step 4
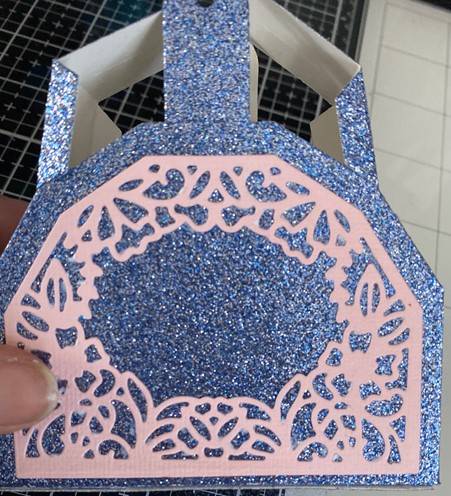
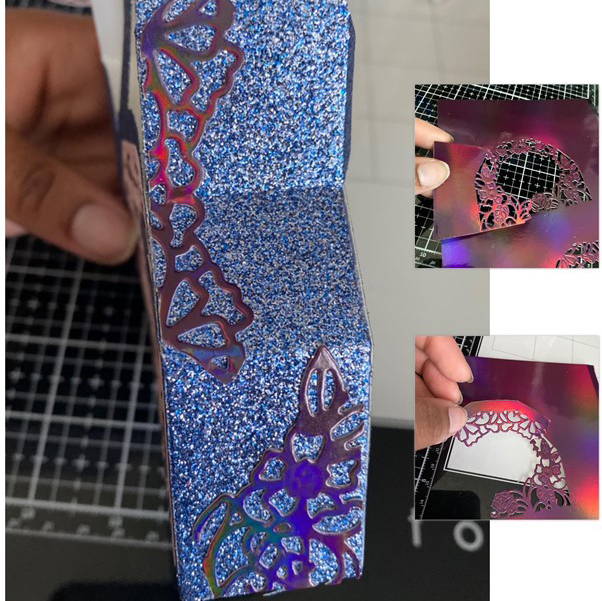
Grab your pink blossom pieces and stick them down. One to the front and the other to the back. Or whichever way you prefer, you can definitely have one side blank if you want. So what if your box is only pretty from the front haha!
Step 5
Use whatever inlay technique you are comfortable with but what I do is fill in a small portion of the area I want to inlay with glue and then hold the inlay piece over it and lightly push each piece into its coordinating gap. I hope this makes sense, if not please just fill the gaps whichever way makes sense to you.
TIP: the embellishment tool and precision tweezers are your best friends for this!
Using the leftover die piece, cut out a bit of it to decorate the side panels, or you can use the provided dies to cut out side panels but since I know you are not wasteful, I hope you will use the leftover pieces right!!
Step 6
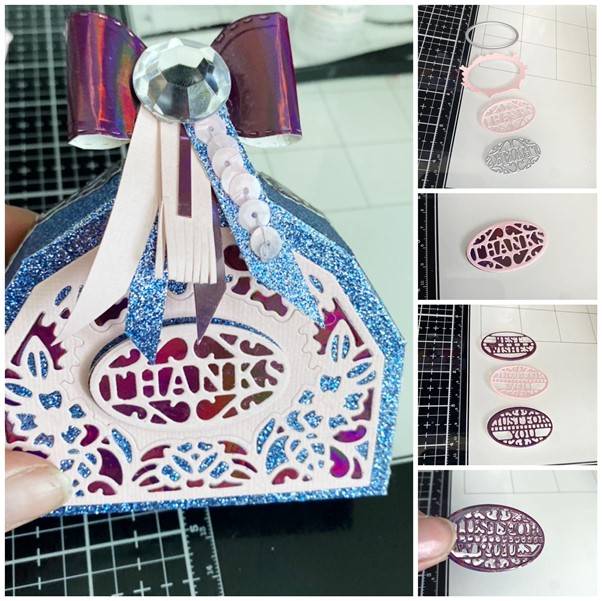
Remember the centre bit you weren't supposed to throw out in step 2, inlay it into its gap. Cut out a pink sentiment oval and purple oval. Stick them together for the front. For the back offset 3 sentiment shapes to create a layered look. The point is for the sentiment not to show so offset it quite a bit! Alternatively, do whatever your beautifully creative mind thinks of .Stick them to their corresponding gaps and your box is done but not complete.
Step 7
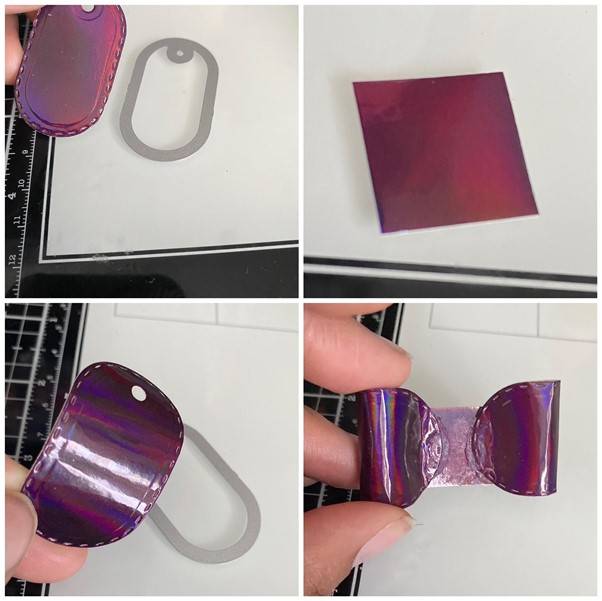
To make the bow piece accessory take an oval tag die and cut out 2 pieces from the purple rain cardstock. Curve the pieces slightly with your finger or bone folder. Using scraps, cut out an approx 1 inch square piece to use as the base for your bow. Using a hot glue gun, stick the pieces onto the edge of the square
Step 8
Take your scraps and cut out strips to mimic ribbon so you could give them an angled edge, roll the edges slightly with a bone folder or even stock sequins onto it. Play around and see what you like. When you are done, stick the strips to the middle of your bow and cover with a gem.
Tip: repurpose the nuvo drops lid gems, they are the perfect size.
Optional Step
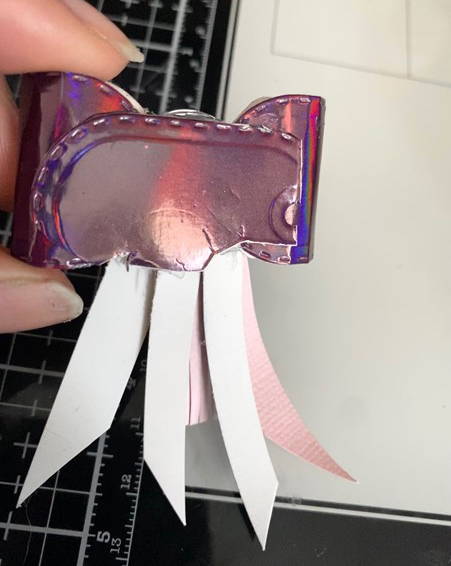
If you want to tidy your bow up because you are a pro at this point, cut a piece of approx. 3.5 x 2 cm from the purple rain cardstock and use it to cover the back. Trim off any excess
Step 9
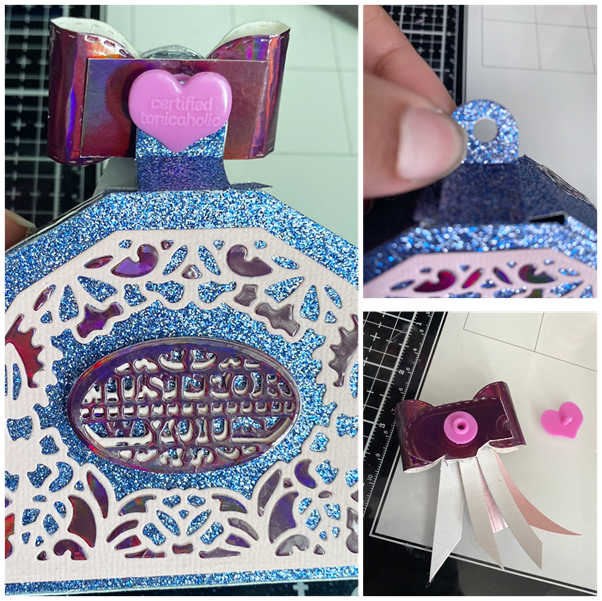
If you are using a brad/ fastener, hot glue your brad to the back of your bow. If you are using one of these super cute Tonic packaging thingies, I’m sure they are brads/fasteners too right??! Anywho, take a hole punch and make the holes of the flap bigger. Then glue the hole bit of the brad to the back of your bow, then insert through the holes you just made and insert the pointy bit. You are all done, your bag is nice and sealed.
Hope you enjoyed making this cute gift box and you were inspired to make your own SUPER cute boxes. Don’t forget to share them all over on facebook and instagram and tag Tonic Studios.

